ActiveMQ - 从下载安装到集群部署
下载安装
-
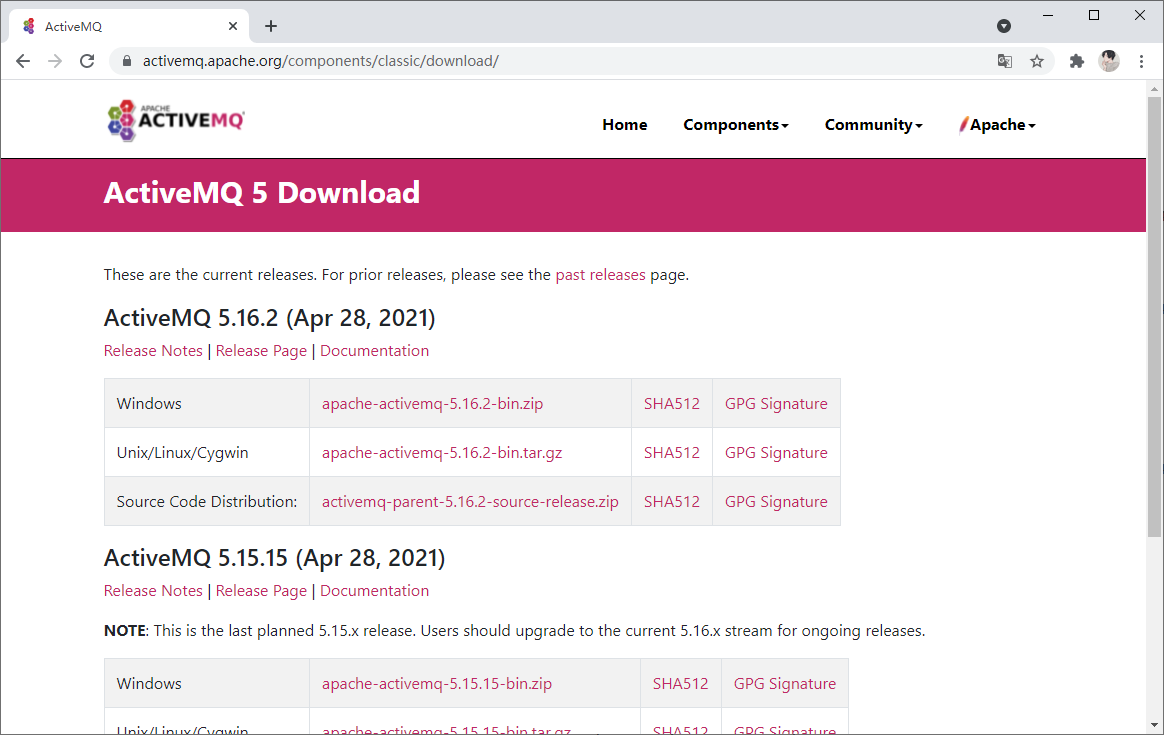
下载地址:https://activemq.apache.org/components/classic/download
-
解压
-
启动
双击执行
...\bin\win64目录下的activemq.bat文件。 -
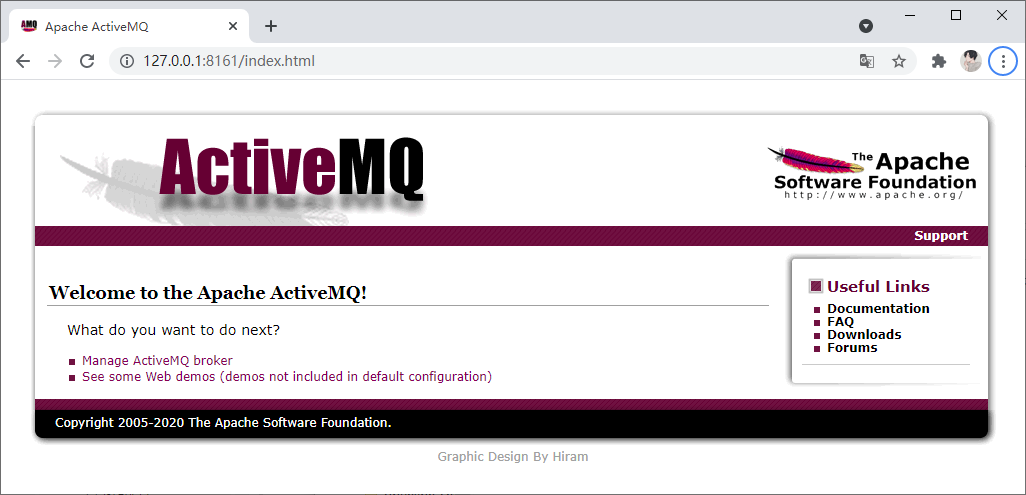
访问 http://127.0.0.1:8161/index.html (账号:admin,密码:admin)
-
默认配置
-
用户名:admin
-
密码:admin
-
后台端口:8161
-
TCP端口:61616
-
-
注意事项
启动时若是报错,可以尝试检查端口是否被占用(RabbitMQ会占用5672端口)。
JMS 知识
JMS(Java Messaging Service)是Java平台上有关面向消息中间件的技术规范,实际上是一套 api ,它便于消息系统中的 Java 应用程序进行消息交换,并且通过提供标准的产生、发送、接收消息的接口简化企业应用的开发, ActiveMQ 而是这个规范的一个具体实现。
JMS 对象模型
-
连接工厂 负责创建一个JMS连接。
-
JMS 连接 它表示JMS客户端和服务器端之间的一个活动的连接,是由客户端通过调用连接工厂的方法建立的。
-
JMS 会话 它表示JMS客户与JMS服务器之间的会话状态。JMS会话建立在JMS连接上,表示客户与服务器之间的一个会话线程。
-
JMS 目的 / Broker 客户用来指定它生产的消息的目标和它消费的消息的来源的对象,一个消息中间件的实例。
-
JMS 生产者和消费者 生产者(Message Producer)和消费者(Message Consumer)对象由Session对象创建,用于发送和接收消息。
消息的消费方式
-
同步消费:通过调用消费者的 receive 方法从目的地中显式提取消息。receive 方法可以一直阻塞到消息到达。
-
异步消费:客户可以为消费者注册一个消息监听器,以定义在消息到达时所采取的动作。
JMS 规范中的消息
JMS 消息由以下三部分组成:
-
消息头:每个消息头字段都有相应的 getter 和 setter 方法。
-
消息属性:如果需要除消息头字段以外的值,那么可以使用消息属性。
-
消息体:JMS 定义的消息类型有
TextMessage、MapMessage、BytesMessage、StreamMessage和ObjectMessage。 ActiveMQ 也有对应的实现。
JMS 消息模型
-
Point-to-Point(P2P) / 点对点
消息通过称为队列的一个虚拟通道来进行交换。队列是生产者发送消息的目的地和接受者消费消息的消息源。
每条消息通仅会传送给一个接受者。可能会有多个接受者在一个队列中侦听,但是每个队列中的消息只能被队列中的一个接受者消费。
消息存在先后顺序。一个队列会按照消息服务器将消息放入队列中的顺序,把它们传送给消费者当消息已被消费时,就会从队列头部将它们删除。
每个消息只有一个消费者(Consumer)(即一旦被消费,消息就不再在消息队列中)
发送者发送了消息之后,不管接收者有没有正在运行,它不会影响到消息被发送到队列。
接收者在成功接收消息之后需向队列应答成功。
如果希望发送的每个消息都应该被成功处理的话,使用这个P2P模式。
-
Topic / 主题(发布订阅(Pub/Sub) )
消息生产者(发布)将消息发布到topic中,同时有多个消息消费者(订阅)消费该消息。和点对点方式不同,发布到topic的消息会被所有订阅者消费。
如果你希望发送的消息可以不被做任何处理、或者被一个消息者处理、或者可以被多个消费者处理的话,那么可以采用topic模型。
原生 ActiveMQ 实例
准备
-
启动 ActiveMQ 消息服务。
-
创建 maven 项目及添加基础依赖。
依赖
<dependency>
    <groupId>org.apache.activemq</groupId>
    <artifactId>activemq-pool</artifactId>
    <!--version-->
</dependency>
代码
-
生产者
Producer.java。package com.xfc.activemq.original; import org.apache.activemq.ActiveMQConnection; import org.apache.activemq.ActiveMQConnectionFactory; import javax.jms.*; public class Producer { //默认连接用户名 public static final String USERNAME = ActiveMQConnection.DEFAULT_USER; //默认连接密码 public static final String PASSWORD = ActiveMQConnection.DEFAULT_PASSWORD; //默认连接地址 public static final String BROKERURL = ActiveMQConnection.DEFAULT_BROKER_URL; public static void main(String[] args) { ConnectionFactory connectionFactory;//连接工厂 Connection connection = null;//连接 Session session;//会话 Destination destination;//消息目的地 MessageProducer messageProducer;//消息生产者 // 1.实例化连接工厂(账号、密码、服务地址) connectionFactory = new ActiveMQConnectionFactory(USERNAME, PASSWORD, BROKERURL); try { // 2.通过连接工厂获取连接 connection = connectionFactory.createConnection(); // 3.启动连接 connection.start(); // 4.创建会话(是否开启事务、消息的确认模式) session = connection.createSession(false, Session.AUTO_ACKNOWLEDGE); // 5.创建一个Topic模式的消息队列(队列名称) destination = session.createTopic("DemoActiveMQ"); // 6.创建消息生产者 messageProducer = session.createProducer(destination); // 7.发送消息 for (int i = 0; i < 3; i++) { String msg = "这是向消息队列发送的第" + i + "条消息"; TextMessage textMessage = session.createTextMessage(msg); messageProducer.send(textMessage); } } catch (JMSException e) { e.printStackTrace(); } finally { if (connection != null) { try { connection.close(); } catch (JMSException e) { e.printStackTrace(); } } } } }请注意包来源。
-
消费者
Consumer.java(基本流程与创建生产者一样)。package com.xfc.activemq.original; import org.apache.activemq.ActiveMQConnection; import org.apache.activemq.ActiveMQConnectionFactory; import javax.jms.*; public class Consumer { //默认连接用户名 public static final String USERNAME = ActiveMQConnection.DEFAULT_USER; //默认连接密码 public static final String PASSWORD = ActiveMQConnection.DEFAULT_PASSWORD; //默认连接地址 public static final String BROKERURL = ActiveMQConnection.DEFAULT_BROKER_URL; public static void main(String[] args) { ConnectionFactory connectionFactory;//连接工厂 Connection connection = null;//连接 Session session;//会话 Destination destination;//消息目的地 MessageConsumer messageConsumer;//消息消费者 // 1.实例化连接工厂(账号、密码、服务地址) connectionFactory = new ActiveMQConnectionFactory(USERNAME, PASSWORD, BROKERURL); try { // 2.通过连接工厂获取连接 connection = connectionFactory.createConnection(); // 3.启动连接 connection.start(); // 4.创建会话(是否开启事务、消息的确认模式) session = connection.createSession(false, Session.AUTO_ACKNOWLEDGE); // 5.创建一个Topic模式的消息队列(队列名称) destination = session.createTopic("DemoActiveMQ"); // 6.创建消息消费者 messageConsumer = session.createConsumer(destination); // 7.同步接收消息 Message message; while ((message = messageConsumer.receive()) != null) { TextMessage textMessage = (TextMessage) message; System.out.println("收到消息:" + textMessage.getText()); } } catch (JMSException e) { e.printStackTrace(); } finally { if (connection != null) { try { connection.close(); } catch (JMSException e) { e.printStackTrace(); } } } } } -
补充说明
在代码
connection.createSession(false, Session.AUTO_ACKNOWLEDGE)中,createSession()方法有两个参数,分别用于表示是否开启事务和消息的确认模式。-
是否开启事务:
当消息发送者向消息提供者(即消息代理)发送消息时,消息发送者等待消息代理的确认,没有回应则抛出异常,消息发送程序负责处理这个错误。
-
消息的确认模式:
AUTO_ACKNOWLEDGE:指定消息接收者在每次收到消息时自动发送确认。消息只向目标发送一次,但传输过程中可能因为错误而丢失消息。CLIENT_ACKNOWLEDGE:由消息接收者确认收到消息,通过调用消息的acknowledge()方法(会通知消息提供者收到了消息)。DUPS_OK_ACKNOWLEDGE:指定消息提供者在消息接收者没有确认发送时重新发送消息(这种确认模式不在乎接收者收到重复的消息)。
-
运行
-
启动消费者
Consumer.java。 -
启动生产者
Producer.java。 -
观察消费者控制台打印语句及 ActiveMQ 管理界面。
消费者控制台打印信息如下:
收到消息:这是向消息队列发送的第0条消息
收到消息:这是向消息队列发送的第1条消息
收到消息:这是向消息队列发送的第2条消息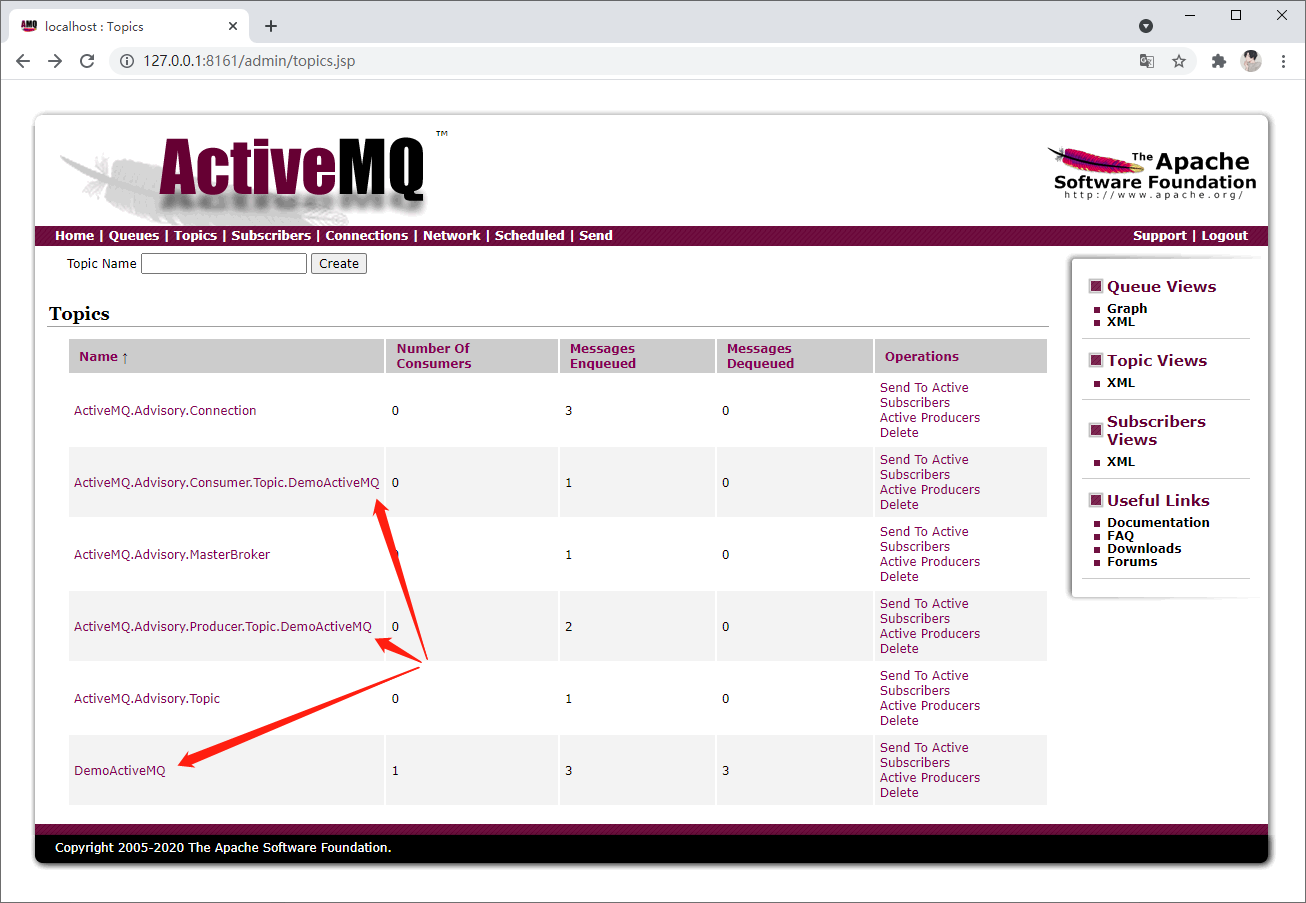
-
更多尝试
-
增加一个消费者,观察是否多个消费者均能收到消息。
-
修改消息类型,观察多个消费者如何接收消息。
-
调换启动顺序,观察消费者是否能获取到消息。
-
关停 ActiveMQ 服务,观察消息队列是否被缓存。
-
扩展
嵌入式 ActiveMQ
在开发过程中,有时为便于测试而没有现成安装的ActiveMQ,则可使用嵌入式ActiveMQ。
package com.xfc.activemq.original;

import org.apache.activemq.broker.BrokerService;
import org.apache.activemq.broker.jmx.ManagementContext;

public class EmbedMQ {

    public static void main(String[] args) throws Exception {
        BrokerService brokerService = new BrokerService();
        brokerService.setBrokerName("EmbedMQ");
        brokerService.addConnector("tcp://localhost:62000");
        brokerService.setManagementContext(new ManagementContext());
        brokerService.start();
    }

}
异步消费
异步消费与同步消费的区别仅在于消费者端接收消息的方式。
同步消费方式(与上述示例相同):
Message message;
while ((message = messageConsumer.receive()) != null) {
    TextMessage textMessage = (TextMessage) message;
    System.out.println("收到消息:" + textMessage.getText());
}
异步消费方式(完整代码):
package com.xfc.activemq.original;

import org.apache.activemq.ActiveMQConnection;
import org.apache.activemq.ActiveMQConnectionFactory;

import javax.jms.*;

public class Consumer {

    //默认连接用户名
    public static final String USERNAME = ActiveMQConnection.DEFAULT_USER;
    //默认连接密码
    public static final String PASSWORD = ActiveMQConnection.DEFAULT_PASSWORD;
    //默认连接地址
    public static final String BROKERURL = ActiveMQConnection.DEFAULT_BROKER_URL;

    public static void main(String[] args) {

        ConnectionFactory connectionFactory;//连接工厂
        Connection connection = null;//连接
        Session session;//会话
        Destination destination;//消息目的地
        MessageConsumer messageConsumer;//消息消费者

        // 1.实例化连接工厂(账号、密码、服务地址)
        connectionFactory = new ActiveMQConnectionFactory(USERNAME, PASSWORD, BROKERURL);
        try {
            // 2.通过连接工厂获取连接
            connection = connectionFactory.createConnection();
            // 3.启动连接
            connection.start();
            // 4.创建会话(是否开启事务、消息的确认模式)
            session = connection.createSession(false, Session.AUTO_ACKNOWLEDGE);
            // 5.创建一个Topic模式的消息队列(队列名称)
            destination = session.createTopic("DemoActiveMQ");
            // 6.创建消息消费者
            messageConsumer = session.createConsumer(destination);
            // 7. 异步接收消息(消息监听器)
            messageConsumer.setMessageListener(message -> {
                TextMessage textMessage = (TextMessage) message;
                try {
                    System.out.println("收到消息:" + textMessage.getText());
                } catch (JMSException e) {
                    e.printStackTrace();
                }
            });
        } catch (JMSException e) {
            e.printStackTrace();
        }
        // 不需要使用 finally 关闭连接。
    }
}
消息持久化
ActiveMQ 提供了以下几种持久化方式:
-
AMQ 消息存储,它是一种基于文件的存储方式,它具有写入速度快和容易恢复的特点。但是,AMQ Message 会为每一个 Destination 创建一个索引,如果使用了大量的Queue,索引文件的大小会占用很多磁盘空间。而且由于索引巨大,一旦 Broker 崩溃,重建索引的速度会非常慢。
-
KahaDB 消息存储,它是 ActiveMQ 目前(ActiveMQ 5.4以后)默认采用的持久化方式,它基于文件的本地数据库储存形式,其恢复时间远远小于 AMQ 并且使用更少的数据文件。
-
JDBC消息存储,它会将数据持久化到数据库,因此需要配置相关的数据库连接。它会向数据库创建3个表:activemq_msgs,activemq_acks和activemq_lock,其中 activemq_msgs 用于存储消息,Queue 和 Topic 都存储在这个表中,其配置方式与 spring 项目开发的配置方式基本一致。
-
LevelDB 存储,与 KahaDB 很相似,它也是基于文件的本地数据库存储形式,但是它提供比 KahaDB 更快的持久性,但它不再使用自定义 B-Tree 实现来索引预写日志,而是使用基于 LevelDB 的索引。
ActiveMQ 默认的持久化方式为 KahaDB ,可以在 config/activemq.xml 文件中的 <persistenceAdapter> 标签下进行修改。
消费模式切换
-
P2P 模式:
session.createQueue("QueueName")(多个消费者默认通过轮询的方式进行消费)。 -
Topic 模式:
session.createTopic("QueueName")。
Topic 模式消息持久化
P2P 模式默认拥有持久化能力,而 Topic 模式需要手动配置持久化。
配置 Topic 模式的消息持久化:
-
生产者指定消息分发模式。
// 统一指定消息发布模式:1.DeliveryMode.PERSISTENT(持久化) 2.DeliveryMode.NON_PERSISTENT(非持久化) messageProducer.setDeliveryMode(DeliveryMode.PERSISTENT); // 单独指定消息发布模式: // messageProducer.send(Message message, int deliveryMode, int priority, long timeToLive); -
消费者设置客户端ID并创建 TopicSubscriber 订阅
package com.xfc.activemq.original;

import org.apache.activemq.ActiveMQConnection;
import org.apache.activemq.ActiveMQConnectionFactory;

import javax.jms.*;

public class PersistenceConsumer {

    public static void main(String[] args) throws Exception {
        ConnectionFactory connectionFactory = new ActiveMQConnectionFactory(ActiveMQConnection.DEFAULT_USER, ActiveMQConnection.DEFAULT_PASSWORD, ActiveMQConnection.DEFAULT_BROKER_URL);
        Connection connection = connectionFactory.createConnection();
        // 设置客户端ID
        connection.setClientID("persistenceConsumer0001");
        Session session = connection.createSession(true, Session.AUTO_ACKNOWLEDGE);
        Topic destination = session.createTopic("DemoActiveMQ");
        // 创建 TopicSubscriber(Topic、订阅者名称)
        TopicSubscriber subscriber = session.createDurableSubscriber(destination, "consumer0001");
        connection.start();
        Message message = subscriber.receive();
        while (message != null) {
            TextMessage textMessage = (TextMessage) message;
            session.commit();
            System.out.println("收到消息:" + textMessage.getText());
            message = subscriber.receive(1000L);
        }
        session.close();
        connection.close();
    }
}
注意:在对 Topic 模式的消息进行持久化处理的情况下,需要先运行一次该消费者程序,以便向消费服务中间件注册该消费者。
通配符式分层订阅
Wildcards 用来支持联合的名字分层体系(federated name hierarchies)。它不是JMS 规范的一部分,而是 ActiveMQ 的扩展。ActiveMQ 支持三种 . 、*、> :
-
. 用于作为路径上名字间的分隔符
-
* 用于匹配路径上的任何名字
-
> 用于递归地匹配任何以这个名字开始的destination
示例:
创建多个 Topic 。
// 生产者A创建Topic
destination = session.createTopic("com.xfc.web.redis.cache");
// 生产者B创建Topic
destination = session.createTopic("com.xfc.h5.redis.cache");// 生产者B创建Topic
destination = session.createTopic("com.xfc.web.thread");消费者通过通配符进行匹配消费。
destination = session.createTopic("com.xfc.*.redis.cache");死信队列
DLQ-死信队列(Dead Letter Queue)用于保存处理失败或者过期的消息。出现以下情况时,消息会被重发:
-
事务会话被回滚。
-
事务会话在提交之前关闭。
-
会话使用 CLIENT_ACKNOWLEDGE 模式,并且 Session.recover() 被调用。
-
自动应答失败。
当一个消息被重发超过最大重发次数(缺省为6次,消费者端可以修改)时,会给broker发送一个“有毒标记”,这个消息被认为是有问题,这时broker将这个消息发送到死信队列,以便后续处理。
缺省的死信队列是ActiveMQ.DLQ,如果没有特别指定,死信都会被发送到这个队列。
缺省持久消息过期,会被送到DLQ,非持久消息不会送到DLQ。
可以通过配置文件(activemq.xml)来调整死信发送策略。
<policyEntry queue=">" producerFlowControl="true" memoryLimit="1mb">
    <deadLetterStrategy>
		<!--
		queuePrefix:设置死信队列前缀
		useQueueForQueueMessages:设置使用队列保存死信
		可以设置useQueueForTopicMessages,指定使用Topic来保存死信。
		-->
    	<individualDeadLetterStrategy queuePrefix="DLQ." useQueueForQueueMessages="true" />
    </deadLetterStrategy>
</policyEntry>
对于不同的业务场景,缺省的死信队列也许并不完全适应,这时我们可以通过 individualDeadLetterStrategy 或 sharedDeadLetterStrategy 策略来进行修改。
示例:
-
不使用缺省的死信队列
<policyEntry queue=">"> <deadLetterStrategy> <!-- queuePrefix:设置死信队列前缀 useQueueForQueueMessages: 设置使用队列保存死信,还可以设置useQueueForTopicMessages,使用Topic来保存死信 --> <individualDeadLetterStrategy queuePrefix="DLQ." useQueueForQueueMessages="true" /> </deadLetterStrategy> </policyEntry> -
非持久消息保存到死信队列
<policyEntry queue=">"> <deadLetterStrategy> <sharedDeadLetterStrategy processNonPersistent="true" /> </deadLetterStrategy> </policyEntry> -
过期消息不保存到死信队列
<policyEntry queue=">"> <deadLetterStrategy> <sharedDeadLetterStrategy processExpired="false" /> </deadLetterStrategy> </policyEntry> -
持久消息不保存到死信队列
对于过期的,可以通过 processExpired 属性来控制,对于 redelivered 的失败的消息,需要通过插件来实现如下:丢弃所有死信
<beans>
    <broker>
        <plugins>
            <discardingDLQBrokerPlugin dropAll="true" dropTemporaryTopics="true" dropTemporaryQueues="true" />
        </plugins>
    </broker>
</beans>
在应用过程中,可以单独使用死信消费者处理这些死信。
消费者设置失败消息重发:
package com.xfc.activemq.original;

import org.apache.activemq.ActiveMQConnection;
import org.apache.activemq.ActiveMQConnectionFactory;
import org.apache.activemq.RedeliveryPolicy;
import org.apache.activemq.command.ActiveMQDestination;

import javax.jms.*;

public class RedeliveryConsumer {

    // ...省略部分代码

    public static void main(String[] args) {

        // 由于需要使用到ActiveMQ的重发策略,所以应当使用ActiveMQ的相关实现类ActiveMQConnectionFactory
        ActiveMQConnectionFactory connectionFactory;//连接工厂
        ActiveMQConnection connection;//连接
        Session session;
        ActiveMQDestination destination;
        MessageConsumer messageConsumer;

        connectionFactory = new ActiveMQConnectionFactory(USERNAME, PASSWORD, BROKERURL);
        try {
            // 设置消息重发机制
            RedeliveryPolicy redeliveryPolicy =  new RedeliveryPolicy();// 或RedeliveryPolicyMap
            redeliveryPolicy.setMaximumRedeliveries(3);// 修改消息重发次数
            connectionFactory.setRedeliveryPolicy(redeliveryPolicy);

            // 创建并启动连接
            connection = (ActiveMQConnection) connectionFactory.createConnection();
            connection.start();

            // ...省略部分代码
        } catch (JMSException e) {
            e.printStackTrace();
        }
    }
}
死信消费者:
// 死信消费者与普通消费者并无区别,无非是各自处理的队列不同而已
destination = session.createTopic("DLQ.>");// 队列通配名称与activemq.xml中保持一致
镜像队列
ActiveMQ 每一个 queue 中消息只能被一个消费者消费,然而,有时候,你希望能够监视生产者和消费者之间的消息流。你可以通过使用 VirtualDestinations 来建立一个 virtualqueue 来吧消息转发到多个 queue 中。但是,为系统每一个 queue 都进行如此的配置可能会很麻烦。
MirroredQueue: Broker 会把发送到某一个队列上的所有消息转发到一个名称类似的topic,因此监控程序只需要订阅这个 mirroredqueue topic 。为启用 MirroredQueue ,首先要将 BrokerService 的 useMirroredQueue 属性设置 为true 。
<broker xmlns="http://activemq.apache.org/schema/core" useMirroredQueue="true">
<!-- ... -->
</broker>
然后可以通过 destinationInterceptors 设置其属性,如 mirrortopic 的前缀,缺省是 VritualTopic.Mirror。
示例:
<broker xmlns="http://activemq.apache.org/schema/core" useMirroredQueue="true">
    <destinationInterceptors>
        <mirroredQueue copyMessage="true" postfix="" prefix="Mirror.Topic." />
    </destinationInterceptors>
</broker>
注意:镜像队列发布的队列消息,但订阅者在消费该镜像队列时,需要采取 Topic 模式,如 session.createTopic("Mirror.Topic.Queue.Tool"); 。
虚拟主题(Virtual Topics)
ActiveMQ支持的虚拟Destinations分为有两种,分别是:
-
虚拟主题(Virtual Topics)
-
组合 Destinations(CompositeDestinations)
在ActiveMQ中,topic只有在持久订阅(durablesubscription)下是持久化的。存在持久订阅时,每个持久订阅者,都相当于一个持久化的queue的客户端,它会收取所有消息。
虚拟主题对于消息发布者来说,就是一个正常的Topic,但名称需以 VirtualTopic. 开头,例如:
destination = session.createTopic("VirtualTopic.MyTopic");对于消息接收端来说,是个队列,不同应用里使用不同的前缀作为队列的名称,即可表明自己的身份即可实现消费端应用分组,例如:
destination = session.createQueue("Consumer.A.VirtualTopic.MyTopic");默认虚拟主题的前缀是:VirtualTopic.> 。
自定义消费虚拟地址默认格式: Consumer.*.VirtualTopic.> 。
自定义消费虚拟地址可以在 activemq.xml 文件中进行修改,如下示例:
<broker xmlns="http://activemq.apache.org/schema/core">
    <destinationInterceptors>
        <virtualDestinationInterceptor>
            <virtualDestinations>
                <virtualTopic name=">" prefix="VirtualTopicConsumers.*." selectorAware="false" />
            </virtualDestinations>
        </virtualDestinationInterceptor>
    </destinationInterceptors>
</broker>
组合队列(CompositeDestinations)
组合队列允许用一个虚拟的destination代表多个 destinations 。这样就可以通过 composite destinations 在一个操作中同时向多个 destination 发送消息,多个destination之间采用逗号分割。例如:
Queue queue = new ActiveMQQueue("FOO.A,FOO.B,FOO.C");或者:
Destination destination = session.createQueue("FOO.A,FOO.B,FOO.C");如果希望使用不同类型的destination,那么需要加上前缀如 queue:// 或 topic:// ,例如:
Queue queue = new ActiveMQQueue("FOO.A,topic://test.compositeDestination");
// destination = session.createQueue("FOO.A,topic://test.compositeDestination");
Spring 整合 ActiveMQ
准备
-
启动ActiveMQ消息服务。
-
创建maven项目。
-
基础依赖。
<!-- JMS -->
<dependency>
    <groupId>javax.jms</groupId>
    <artifactId>jms</artifactId>
    <version>1.1</version>
</dependency>
<!-- ActiveMQ核心依赖 -->
<dependency>
    <groupId>org.apache.activemq</groupId>
    <artifactId>activemq-core</artifactId>
    <version>5.5.0</version>
</dependency>
<dependency>
    <groupId>org.apache.activemq</groupId>
    <artifactId>activemq-pool</artifactId>
    <version>5.7.0</version>
</dependency>
<!-- Spring相关依赖 -->
<dependency>
    <groupId>org.springframework</groupId>
    <artifactId>spring-core</artifactId>
    <version>${spring.version}</version>
</dependency>

<dependency>
    <groupId>org.springframework</groupId>
    <artifactId>spring-web</artifactId>
    <version>${spring.version}</version>
</dependency>
<dependency>
    <groupId>org.springframework</groupId>
    <artifactId>spring-oxm</artifactId>
    <version>${spring.version}</version>
</dependency>
<dependency>
    <groupId>org.springframework</groupId>
    <artifactId>spring-tx</artifactId>
    <version>${spring.version}</version>
</dependency>

<dependency>
    <groupId>org.springframework</groupId>
    <artifactId>spring-jdbc</artifactId>
    <version>${spring.version}</version>
</dependency>

<dependency>
    <groupId>org.springframework</groupId>
    <artifactId>spring-webmvc</artifactId>
    <version>${spring.version}</version>
</dependency>
<dependency>
    <groupId>org.springframework</groupId>
    <artifactId>spring-aop</artifactId>
    <version>${spring.version}</version>
</dependency>

<dependency>
    <groupId>org.springframework</groupId>
    <artifactId>spring-context-support</artifactId>
    <version>${spring.version}</version>
</dependency>

<dependency>
    <groupId>org.springframework</groupId>
    <artifactId>spring-test</artifactId>
    <version>${spring.version}</version>
</dependency>
<dependency>
    <groupId>org.springframework</groupId>
    <artifactId>spring-jms</artifactId>
    <version>${spring.version}</version>
</dependency>
<!-- 日志相关依赖 -->
<dependency>
    <groupId>log4j</groupId>
    <artifactId>log4j</artifactId>
    <version>1.2.17</version>
</dependency>
<dependency>
    <groupId>org.slf4j</groupId>
    <artifactId>slf4j-api</artifactId>
    <version>1.6.1</version>
</dependency>
<dependency>
    <groupId>org.slf4j</groupId>
    <artifactId>slf4j-log4j12</artifactId>
    <version>1.6.1</version>
</dependency>
配置
配置spring-activemq.xml :
<beans xmlns="http://www.springframework.org/schema/beans"
       xmlns:amq="http://activemq.apache.org/schema/core"
       xmlns:xsi="http://www.w3.org/2001/XMLSchema-instance"
       xmlns:p="http://www.springframework.org/schema/p"
       xmlns:context="http://www.springframework.org/schema/context"
       xmlns:jms="http://www.springframework.org/schema/jms"
       xsi:schemaLocation="http://www.springframework.org/schema/beans
        http://www.springframework.org/schema/beans/spring-beans-2.0.xsd
        http://activemq.apache.org/schema/core http://activemq.apache.org/schema/core/activemq-core.xsd
        http://www.springframework.org/schema/context
        http://www.springframework.org/schema/context/spring-context.xsd
        http://www.springframework.org/schema/jms http://www.springframework.org/schema/jms/spring-jms-3.0.xsd">

    <!-- ... -->

    <!-- ActiveMQ 连接工厂 -->
    <amq:connectionFactory id="amqConnectionFactory" brokerURL="tcp://127.0.0.1:61616" userName="admin" password="admin"/></bean>

    <!-- 经过缓存包装后的连接工厂:便于对sessions,connections和producers进行缓存复用,从而提升性能 -->
    <bean id="connectionFactory" class="org.springframework.jms.connection.CachingConnectionFactory">
        <property name="targetConnectionFactory" ref="amqConnectionFactory"></property>
        <property name="sessionCacheSize" value="100"></property>
    </bean>

    <!-- 定义消息队列(Queue) -->
    <bean id="demoQueueDestination" class="org.apache.activemq.command.ActiveMQQueue">
        <!-- 设置消息队列的名字 -->
        <constructor-arg value="FOO.TEST" />
    </bean>

    <!-- 构建JmsTemplate -->
    <bean id="jmsQueueTemplate" class="org.springframework.jms.core.JmsTemplate">
        <constructor-arg ref="connectionFactory"></constructor-arg>
        <!-- true是topic,false是queue,默认是false -->
        <property name="pubSubDomain" value="false"></property>
    </bean>

    <!--接收消费者应答的监听器-->
    <jms:listener-container destination-type="queue" container-type="default" connection-factory="connectionFactory" acknowledge="auto">
        <jms:listener destination="FOO.TEST" ref="getResponse"></jms:listener>
    </jms:listener-container>

    <!-- ... -->
</beans>
代码
构建监听器:
package cn.xfc.queue;

import org.springframework.stereotype.Component;

import javax.jms.JMSException;
import javax.jms.Message;
import javax.jms.MessageListener;
import javax.jms.TextMessage;

@Component
public class GetResponse implements MessageListener {
    public void onMessage(Message message) {
        String textMsg = null;
        try {
            textMsg = ((TextMessage) message).getText();
            System.out.println("接收到消息 : " + textMsg);
        } catch (JMSException e) {
            e.printStackTrace();
        }

    }
}
封装消息生成器:
package com.xfc.creator;

import org.springframework.jms.core.MessageCreator;

import javax.jms.JMSException;
import javax.jms.Message;
import javax.jms.Session;
import javax.jms.TextMessage;

public class MyMessageCreator implements MessageCreator {

    private int id;

    public MyMessageCreator(int id) {
        this.id = id;
    }

    @Override
    public Message createMessage(Session session) throws JMSException {
        String str = "Spring-ActiveMQ发送的第【" + id + "】条消息";
        TextMessage message = session.createTextMessage(str);
        System.out.println(str);
        return message;
    }
}
生产者示例:
package com.xfc.producer;

import com.xfc.creator.MyMessageCreator;
import org.springframework.beans.factory.annotation.Autowired;
import org.springframework.jms.core.JmsTemplate;
import org.springframework.stereotype.Component;

@Component(value = "producer")
public class SimpleProducer {
    @Autowired
    private JmsTemplate jmsTemplate;

    public void sendMessage() throws Exception {
        //每次发送10条信息
        for(int i = 0 ; i < 10 ; i++) {
            //这里填入创建好的信息生成器
            jmsTemplate.send(new MyMessageCreator(i));
        }
    }
}
测试
@Test
public void testAmqProducer() {
    ApplicationContext context = new ClassPathXmlApplicationContext("spring-activemq.xml");
    SimpleProducer simpleProducer = (SimpleProducer) context.getBean("producer");
    try {
        simpleProducer.sendMessage();
    } catch (Exception e) {
        e.printStackTrace();
    }
}
Springboot 整合 ActiveMQ
准备
-
创建maven项目。
-
依赖
<!--ActiveMq-->
<dependency>
    <groupId>org.springframework.boot</groupId>
    <artifactId>spring-boot-starter-activemq</artifactId>
    <version>1.5.0.RELEASE</version>
</dependency>
<!--消息队列连接池-->
<dependency>
    <groupId>org.apache.activemq</groupId>
    <artifactId>activemq-pool</artifactId>
    <version>5.15.0</version>
</dependency>
配置
application.yml
server:
  port: 8080

spring:
  activemq:
    broker-url: tcp://127.0.0.1:61616
    user: admin
    password: admin
    close-timeout: 15s   # 在考虑结束之前等待的时间
    in-memory: true      # 默认代理URL是否应该在内存中。如果指定了显式代理,则忽略此值。
    non-blocking-redelivery: false  # 是否在回滚回滚消息之前停止消息传递。这意味着当启用此命令时,消息顺序不会被保留。
    send-timeout: 0     # 等待消息发送响应的时间。设置为0等待永远。
    queue-name: active.queue
    topic-name: active.topic.name.model

#  packages:
#    trust-all: true #不配置此项,会报错
  pool:
    enabled: true
    max-connections: 10   #连接池最大连接数
    idle-timeout: 30000   #空闲的连接过期时间,默认为30秒

 # jms:
 #   pub-sub-domain: true  #默认情况下activemq提供的是queue模式,若要使用topic模式需要配置下面配置

# 是否信任所有包
#spring.activemq.packages.trust-all=
# 要信任的特定包的逗号分隔列表(当不信任所有包时)
#spring.activemq.packages.trusted=
# 当连接请求和池满时是否阻塞。设置false会抛“JMSException异常”。
#spring.activemq.pool.block-if-full=true
# 如果池仍然满,则在抛出异常前阻塞时间。
#spring.activemq.pool.block-if-full-timeout=-1ms
# 是否在启动时创建连接。可以在启动时用于加热池。
#spring.activemq.pool.create-connection-on-startup=true
# 是否用Pooledconnectionfactory代替普通的ConnectionFactory。
#spring.activemq.pool.enabled=false
# 连接过期超时。
#spring.activemq.pool.expiry-timeout=0ms
# 连接空闲超时
#spring.activemq.pool.idle-timeout=30s
# 连接池最大连接数
#spring.activemq.pool.max-connections=1
# 每个连接的有效会话的最大数目。
#spring.activemq.pool.maximum-active-session-per-connection=500
# 当有"JMSException"时尝试重新连接
#spring.activemq.pool.reconnect-on-exception=true
# 在空闲连接清除线程之间运行的时间。当为负数时,没有空闲连接驱逐线程运行。
#spring.activemq.pool.time-between-expiration-check=-1ms
# 是否只使用一个MessageProducer
#spring.activemq.pool.use-anonymous-producers=true
代码
启动类
import org.springframework.boot.SpringApplication;
import org.springframework.boot.autoconfigure.SpringBootApplication;
import org.springframework.jms.annotation.EnableJms;

@SpringBootApplication
@EnableJms// 启动消息队列
public class SpringbootActivemqApplication {

    public static void main(String[] args) {
        SpringApplication.run(SpringbootActivemqApplication.class, args);
    }

}
ActiveMQConfig
import org.apache.activemq.ActiveMQConnectionFactory;
import org.apache.activemq.command.ActiveMQQueue;
import org.apache.activemq.command.ActiveMQTopic;
import org.springframework.beans.factory.annotation.Value;
import org.springframework.context.annotation.Bean;
import org.springframework.context.annotation.Configuration;
import org.springframework.jms.config.JmsListenerContainerFactory;
import org.springframework.jms.config.SimpleJmsListenerContainerFactory;
import org.springframework.jms.core.JmsMessagingTemplate;
import javax.jms.ConnectionFactory;
import javax.jms.Queue;
import javax.jms.Topic;

@Configuration
publicclass BeanConfig {

    @Value("${spring.activemq.broker-url}")
    private String brokerUrl;

    @Value("${spring.activemq.user}")
    private String username;

    @Value("${spring.activemq.topic-name}")
    private String password;

    @Value("${spring.activemq.queue-name}")
    private String queueName;

    @Value("${spring.activemq.topic-name}")
    private String topicName;

    @Bean(name = "queue")
    public Queue queue() {
        return new ActiveMQQueue(queueName);
    }

    @Bean(name = "topic")
    public Topic topic() {
        return new ActiveMQTopic(topicName);
    }

    @Bean
    public ConnectionFactory connectionFactory(){
        return new ActiveMQConnectionFactory(username, password, brokerUrl);    }

    @Bean
    public JmsMessagingTemplate jmsMessageTemplate(){
        return new JmsMessagingTemplate(connectionFactory());
    }

    // 在Queue模式中,对消息的监听需要对containerFactory进行配置
    @Bean("queueListener")
    public JmsListenerContainerFactory<?> queueJmsListenerContainerFactory(ConnectionFactory connectionFactory){
        SimpleJmsListenerContainerFactory factory = new SimpleJmsListenerContainerFactory();
        factory.setConnectionFactory(connectionFactory);
        factory.setPubSubDomain(false);
        return factory;
    }

    //在Topic模式中,对消息的监听需要对containerFactory进行配置
    @Bean("topicListener")
    public JmsListenerContainerFactory<?> topicJmsListenerContainerFactory(ConnectionFactory connectionFactory){
        SimpleJmsListenerContainerFactory factory = new SimpleJmsListenerContainerFactory();
        factory.setConnectionFactory(connectionFactory);
        factory.setPubSubDomain(true);
        return factory;
    }
}
生产者(Queue和Topic)
import org.springframework.beans.factory.annotation.Autowired;
import org.springframework.jms.core.JmsMessagingTemplate;
import org.springframework.web.bind.annotation.PostMapping;
import org.springframework.web.bind.annotation.RequestBody;
import org.springframework.web.bind.annotation.RestController;
import javax.jms.Destination;
import javax.jms.Queue;
import javax.jms.Topic;

@RestController
public class ProducerController {
    @Autowired
    private JmsMessagingTemplate jmsMessagingTemplate;

    @Autowired
    private Queue queue;

    @Autowired
    private Topic topic;

    @PostMapping("/queue/test")
    public String sendQueue(@RequestBody String str) {
        this.sendMessage(this.queue, str);
        return "success";
    }

    @PostMapping("/topic/test")
    public String sendTopic(@RequestBody String str) {
        this.sendMessage(this.topic, str);
        return "success";
    }

    // 发送消息,destination是发送到的队列,message是待发送的消息
    private void sendMessage(Destination destination, final String message){
        jmsMessagingTemplate.convertAndSend(destination, message);
    }
}
消费者(Queue)
import org.springframework.jms.annotation.JmsListener;
import org.springframework.stereotype.Component;
@Component
public class QueueConsumerListener {
    //queue模式的消费者
    @JmsListener(destination="${spring.activemq.queue-name}", containerFactory="queueListener")
    public void readActiveQueue(String message) {
        System.out.println("queue接收到:" + message);
    }
}
消费者(Topic)
import org.springframework.jms.annotation.JmsListener;
import org.springframework.stereotype.Component;

@Component
public class TopicConsumerListener {
    //topic模式的消费者
    @JmsListener(destination="${spring.activemq.topic-name}", containerFactory="topicListener")
    public void readActiveQueue(String message) {
        System.out.println("topic接收到:" + message);
    }
}
测试
-
向接口 http://localhost:8080/queue/test 发送POST请求。
-
向接口 http://localhost:8080/topic/test 发送POST请求。
这里将生产者和消费者放在同一项目模块下,而在实际项目应用中,应当分模块进行。
ActiveMQ 集群
TODO
版权声明
本文链接:https://www.chinmoku.cc/java/advanced/activemq-tutorial/
本博客中的所有内容,包括但不限于文字、图片、音频、视频、图表和其他可视化材料,均受版权法保护。未经本博客所有者书面授权许可,禁止在任何媒体、网站、社交平台或其他渠道上复制、传播、修改、发布、展示或以任何其他方式使用此博客中的任何内容。